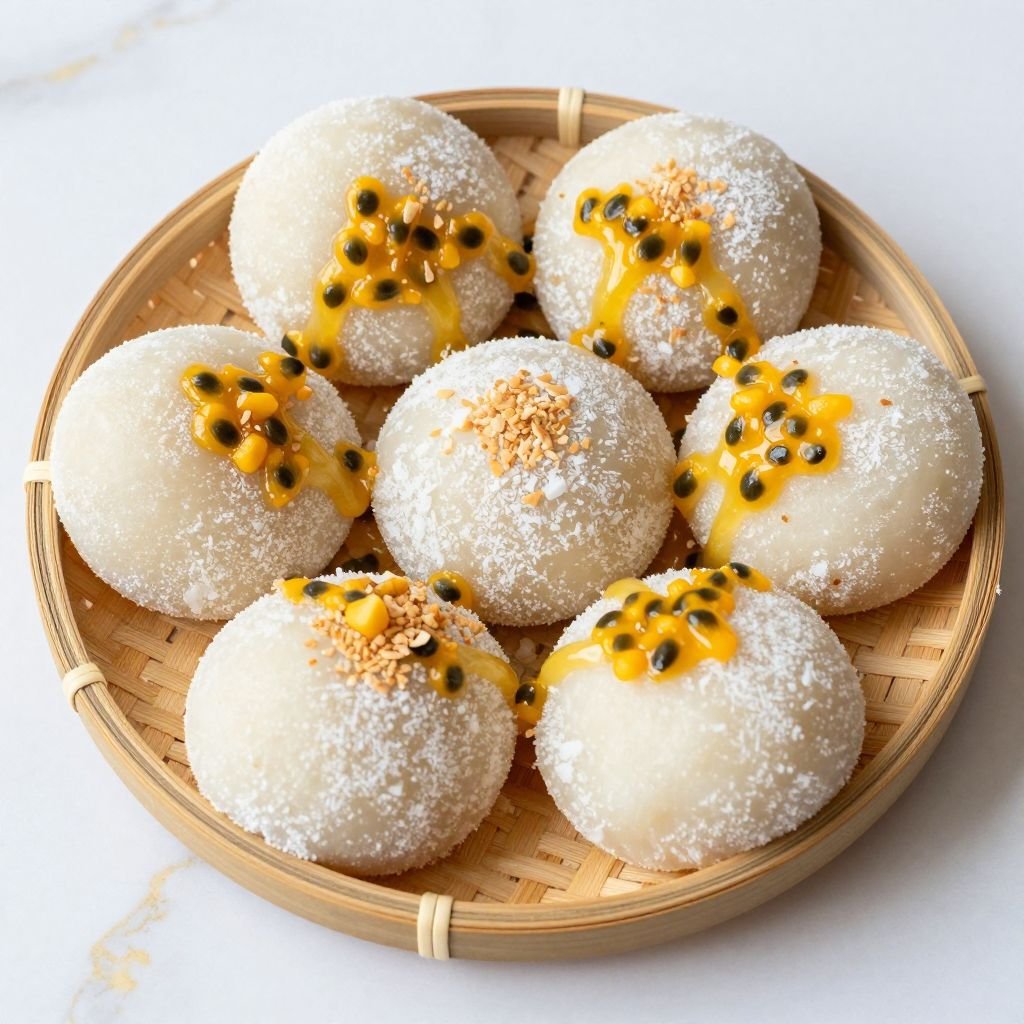
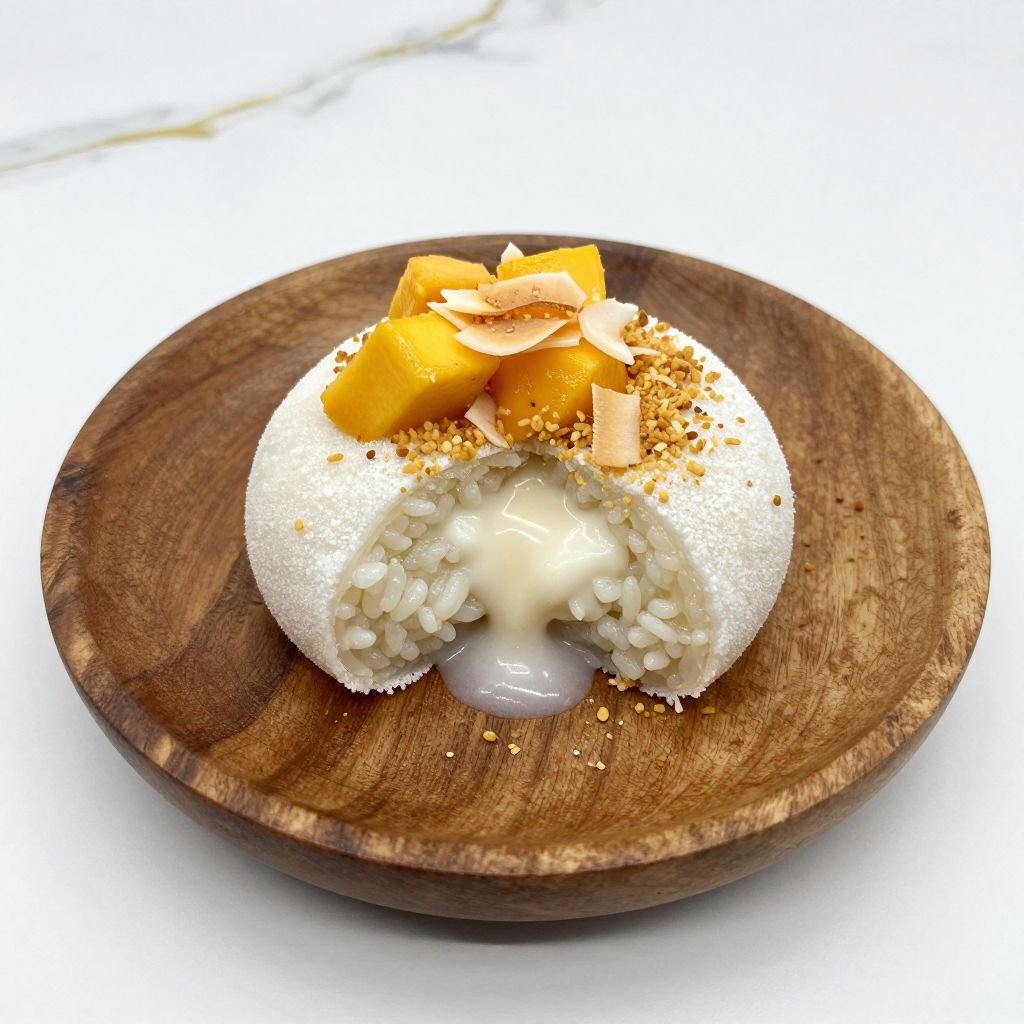
The first bite releases a wave of toasted coconut and chewy sweetness that transports you straight to a tropical beach. This Hawaiian-style treat wraps creamy coconut-infused sweet rice in a delicate, pillowy exterior that’s both satisfying and surprisingly light. What started as a traditional Asian dessert has evolved into a fusion favorite that disappears at potlucks faster than you can say “aloha.”
Why You’ll Love This Recipe
- Foolproof texture – The sweet rice flour creates that signature mochi chew without any tricky steaming or wrapping techniques
- Make-ahead friendly – These keep beautifully for 3 days at room temperature, making them perfect for parties and gift boxes
- Naturally gluten-free – Sweet rice flour (mochiko) is inherently gluten-free, so no substitutions needed for sensitive guests
- One-bowl mixing – Everything comes together in a single bowl with just a whisk, then bakes hands-off in the oven
- Tropical flavor that isn’t artificial – Real coconut milk and shredded coconut deliver authentic island taste without extracts or syrups
Pro Tips
- Toast your coating coconut first – Spread shredded coconut on a baking sheet and toast at 325°F for 5-7 minutes until golden. This adds a nutty depth that makes the exterior irresistible and prevents the coating from tasting raw.
- Use full-fat coconut milk only – Light versions have too much water and won’t create the rich, creamy texture you need. Shake the can well before opening to redistribute the cream.
- Test doneness with the center, not the edges – The mochi is ready when the center jiggles slightly but doesn’t slosh. Overbaking creates a rubbery texture instead of that perfect chewy-tender bite.
- Cool completely before cutting – Warm mochi is nearly impossible to slice cleanly. Wait at least 2 hours, or chill for 1 hour, then use a plastic knife or bench scraper lightly oiled to prevent sticking.
Tropical Sweet Rice Coconut Mochi
Ingredients
Method
- Preheat your oven to 350°F (175°C). Grease a 9×13-inch baking pan thoroughly with butter or coconut oil, then line with parchment paper, leaving overhang on two sides for easy removal.
- Toast 1 cup of the shredded coconut on a baking sheet for 5-7 minutes until golden brown, stirring once halfway through. Set aside to cool completely.
- In a large mixing bowl, whisk together the sweet rice flour, sugar, and salt until no lumps remain.
- In a separate bowl, whisk the eggs until smooth, then add the coconut milk, whole milk, melted butter, and vanilla extract. Whisk until completely combined.
- Pour the wet ingredients into the dry ingredients and whisk vigorously for 1-2 minutes until you have a smooth, slightly thick batter with no flour pockets visible.
- Fold in the remaining 1/2 cup untoasted shredded coconut until evenly distributed throughout the batter.
- Pour the batter into the prepared pan and spread into an even layer. Bake for 60-70 minutes, until the top is golden brown and the center jiggles slightly but doesn’t slosh when you gently shake the pan.
- Remove from the oven and let cool in the pan on a wire rack for at least 2 hours, or refrigerate for 1 hour until completely set and cool to the touch.
- Use the parchment overhang to lift the mochi block onto a cutting board. Cut into 24 squares using a lightly oiled knife or plastic bench scraper, wiping the blade clean between cuts.
- Roll each square in the toasted coconut, pressing gently so it adheres to all sides. Arrange on a serving platter and enjoy immediately or store in an airtight container.
Frequently Asked Questions
Can I use regular rice flour instead of sweet rice flour?
No, regular rice flour won’t work for this recipe. Sweet rice flour (mochiko or glutinous rice flour) has a different starch structure that creates the signature chewy mochi texture. Regular rice flour will produce a crumbly, cake-like result instead.
Why is my mochi too sticky to cut?
This usually means it needs more cooling time or the batter was slightly undercooked. Refrigerate the pan for 30 minutes to firm it up, then oil your knife between cuts. You can also dust the top surface with cornstarch before slicing.
Can I make these without a mixer?
Absolutely. This recipe only requires a whisk and some arm strength. The batter should be smooth and slightly thick, like pancake batter, which takes about 2 minutes of vigorous whisking by hand.
How do I store leftovers to keep them soft?
Store in an airtight container at room temperature for up to 3 days. Don’t refrigerate unless necessary, as cold temperatures can make the texture firmer. If they do firm up, let them sit at room temperature for 30 minutes before serving.
Storage & Serving
Keep these tropical treats in an airtight container at room temperature for up to 3 days, where they’ll maintain their perfect chew. For longer storage, freeze individual pieces wrapped in plastic wrap for up to 2 months, then thaw at room temperature for an hour. Serve them as an elegant finish to an Asian-inspired dinner, pack them in lunchboxes for a sweet midday surprise, or arrange them on a platter with fresh mango slices and a dusting of powdered sugar for a stunning dessert spread.
These coconut-kissed squares prove that the best desserts don’t need to be complicated—just let the tropical flavors shine and watch them vanish.