
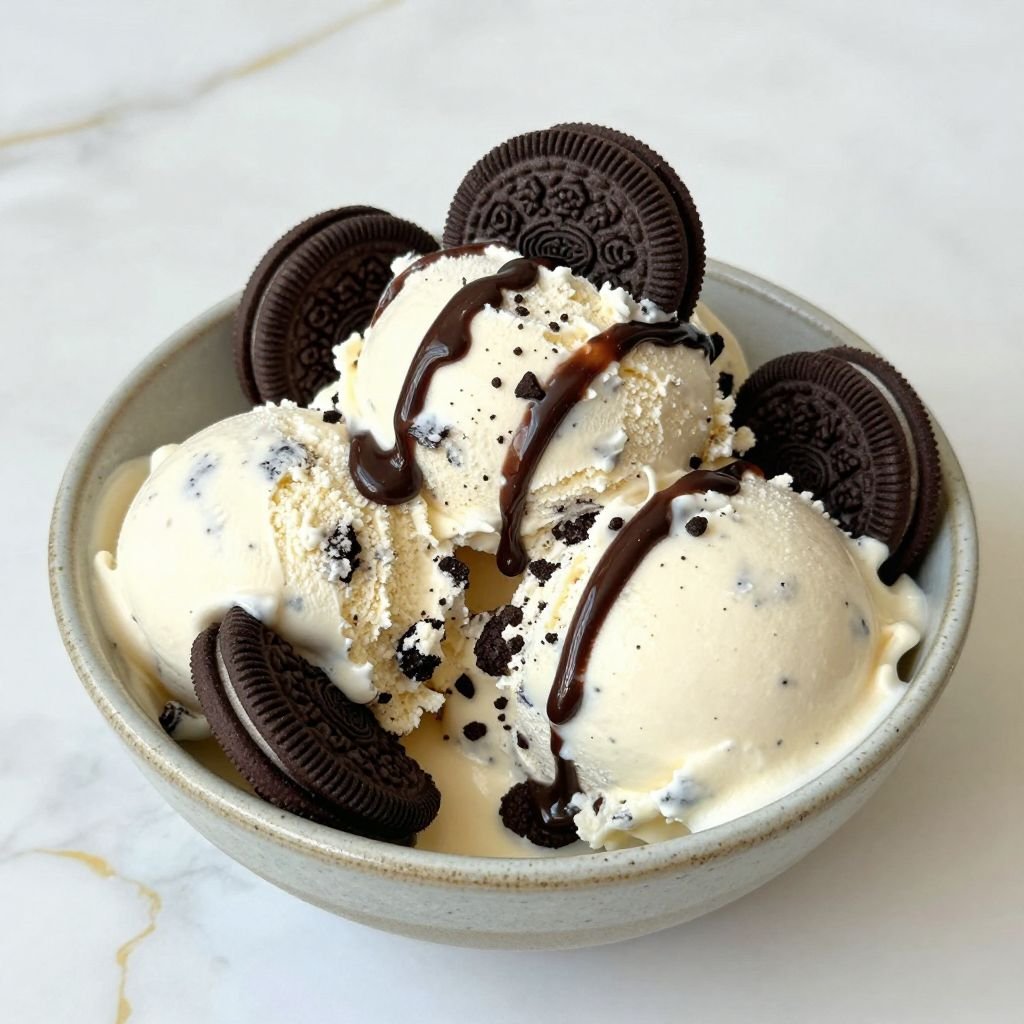
The first bite sends you straight to childhood summers — velvety vanilla ice cream studded with crunchy chocolate cookie pieces, each spoonful delivering that perfect contrast of creamy and crispy. This no-churn version captures everything you love about cookies and cream without an ice cream maker, using just a handful of ingredients and one bowl. In under 20 minutes of hands-on work, you’ll have a freezer stash that rivals any premium pint.
Why You’ll Love This Recipe
- No ice cream maker required — just a hand mixer and a loaf pan you already own
- Impossibly creamy texture from whipped cream and sweetened condensed milk, no ice crystals
- Ready to scoop in 6 hours with zero churning, stirring, or babysitting
- Customize the cookie-to-cream ratio to your exact craving (go wild or keep it classic)
- Makes the perfect base for ice cream sandwiches, birthday cakes, or midnight snacking straight from the container
Pro Tips
- Crush your Oreos to varied sizes — some fine crumbs, some chunky pieces — for textural interest in every bite. Pulse in a food processor 3-4 times or smash in a sealed bag with a rolling pin.
- Whip the heavy cream to stiff peaks before folding in the condensed milk. Under-whipped cream means icy texture instead of that signature dense creaminess.
- Fold the crushed cookies in gently at the very end. Over-mixing deflates the air you just whipped in, and you’ll lose that luxurious mouthfeel.
- Line your pan with parchment paper for easy scooping later. Press it into the corners and let the edges hang over — you can lift the entire block out and slice it for sandwiches.
Homemade Oreo Cookies and Cream Ice Cream
Ingredients
Method
- Line a 9×5-inch loaf pan with parchment paper, letting the edges hang over the sides. Set aside.
- Pour the cold heavy cream into a large mixing bowl. Using a hand mixer on medium-high speed, beat for 3-4 minutes until stiff peaks form. The cream should hold its shape when you lift the beaters.
- In a separate bowl, whisk together the sweetened condensed milk, vanilla extract, and salt until smooth and combined.
- Gently fold the condensed milk mixture into the whipped cream using a rubber spatula. Use broad, sweeping motions from the bottom of the bowl upward, rotating the bowl as you fold. Continue until no white streaks remain, being careful not to deflate the cream.
- Crush the Oreo cookies into a mix of fine crumbs and chunky pieces by pulsing in a food processor 3-4 times, or seal in a bag and crush with a rolling pin.
- Fold the crushed cookies into the cream mixture with 5-6 gentle strokes, just until evenly distributed. A few marbled streaks are fine.
- Pour the mixture into the prepared loaf pan and smooth the top with an offset spatula. Tap the pan gently on the counter twice to release any air bubbles.
- Cover tightly with plastic wrap, pressing it directly onto the surface, then wrap the entire pan in aluminum foil. Freeze for at least 6 hours or overnight until completely firm.
- Remove from freezer and let sit at room temperature for 5-7 minutes before scooping. Use the parchment overhang to lift the ice cream block out for easier serving or slicing.
Frequently Asked Questions
Can I use reduced-fat cream or milk instead?
Heavy cream with at least 36% fat content is essential for the no-churn method. Lower-fat alternatives won’t whip to stiff peaks and will freeze rock-hard. Stick with full-fat for scoopable results.
How long does homemade ice cream last in the freezer?
It stays fresh for up to 2 weeks in an airtight container, though the texture is best within the first week. Press plastic wrap directly onto the surface before sealing to prevent freezer burn.
What if my ice cream is too hard to scoop?
Let it sit at room temperature for 5-7 minutes before scooping. Homemade versions freeze slightly harder than store-bought because they lack commercial stabilizers. A warm ice cream scoop helps too.
Can I swap Oreos for other cookies?
Absolutely! Try chocolate chip cookies for a different twist, or use half Oreos and half brownie chunks. Avoid soft cookies that turn mushy — you want something that stays crunchy when frozen.
Storage & Serving
Store in a freezer-safe container with a tight lid for up to 2 weeks, pressing parchment paper onto the surface to prevent ice crystals. Serve in waffle cones for a classic treat, sandwich between homemade chocolate cookies for next-level indulgence, or layer into a no-bake icebox cake. Let it soften 5 minutes before scooping for the creamiest texture.
This is the ice cream you’ll make all summer long — and then again in winter when you need something cold and sweet to balance all the warm spice desserts. Give it a try this weekend and taste the difference homemade makes.